Photography Tuesday: The dirty, no good, rotten truth about selling stock photography

Stock photography isn’t what it used to be. Gone are the cheesy cutouts and posed images. Those who purchase stock photography now want authentic, real-life images for their advertising – at least to make it look like they are authentic, real-life companies, selling authentic, real-life products.

I delved into the world of stock photography a couple of years ago, even purchasing a fancy Nikon d750 to help reduce the grain in my images so there would be more chance they would be accepted by the stock agencies. I knew from research I wouldn’t make a ton of money submitting my images to agencies that then sell them to advertisers, bloggers, or other content managers, but I hoped to make a little extra to add to our household needs.

Building up a portfolio for stock photography can take a very long time. I knew this, but this past year I’ve been more than a little discouraged with the industry and have learned stock may be a way to earn a small side income, but not necessarily a career. Unless you already have the cash to travel the world or are single with no children, stock photography is an extremely difficult “job” to make money at.

Still, I plug away at it, submitting photos here and there because it’s not like they’re going to make any money sitting on my hard drive or even hanging on my walls. And even if the money isn’t a lot, it’s something and every little bit counts in this day and age. Last year I was featured on Alamy.com as a featured artist and hoped that would boost my sales. It didn’t, but the honor was a nice one to have, at least.

If you are a photographer who is considering stock photography, some advice I would give is to not expect to make a great deal of money, even if you are accepted by a “high end” stock agency like I was. At least not at first. When I first signed up with one high-end agency, I was promised a starting price of $150 for each image sold, if not higher, but once I was accepted and began submitting images, that amount suddenly decreased until one of my last sales with them was 83 cents for one image. On the other end of the spectrum I also sold one for $120, so, in other words, I’ve discovered the amount you could make with stock varies greatly.

With many agencies you need at least 500 images to start making sales and usually having more than 1,000 is even better. Most agencies allow you to submit whatever images you want but then they must pass “quality control” to be added to your final portfolio. The standards of some agencies are higher than others. For example, Alamy allows almost anything to be submitted as long as it isn’t graphic, nudes, out of focus, or severely grainy. Their collection is aimed at anyone and everyone, much like Shutterstock, which I believe is based in the US. For an agency like Cavan Images, your images will be accepted only if they fit their particular style, which is more artsy-fartsy, as I call it. They say their agency is for more high end clients but, again, this is the agency that once sold one of my photos for 83 cents and another for 67 cents so …. don’t always take an agency at their word.

To pass quality control for most agencies the images don’t have to be artistically amazing, but they should be bright and without grain or blur. Each stock agency has their own rules about what the photos need to pass quality control and you can usually find that listed on the site before you submit.

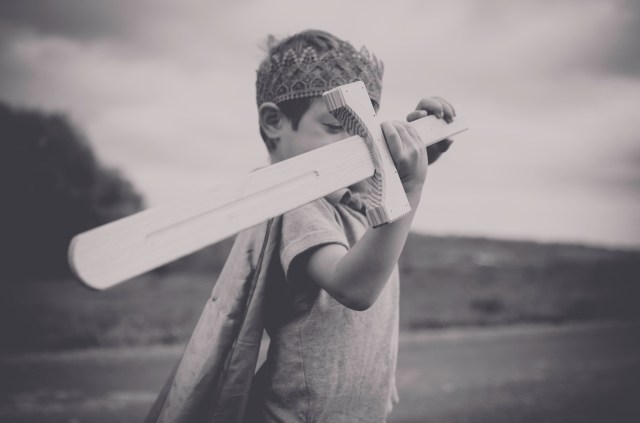
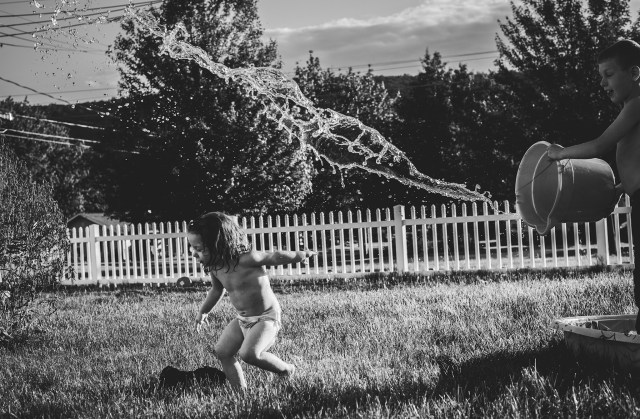
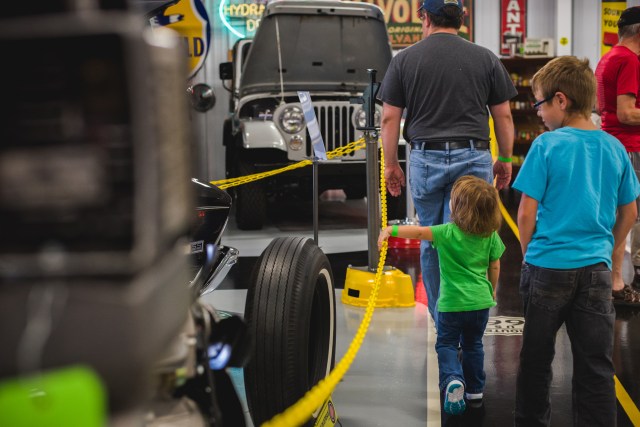
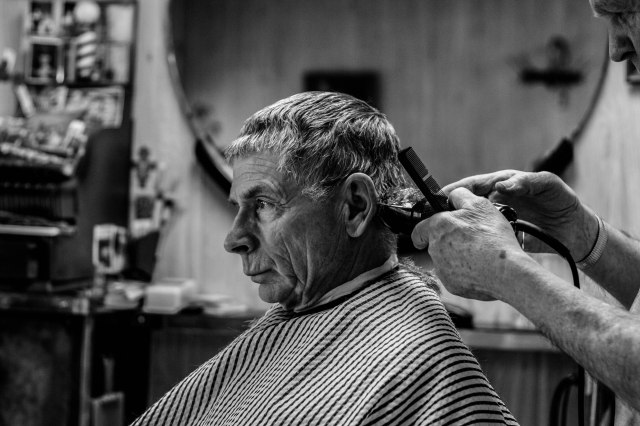
As for what sells in stock photography: the answer is almost anything, yet sometimes nothing. With some agencies, you can upload whatever you want because you never know what will sell. I’ve seen portfolios with photos of newspapers and trash cans and hands holding cellphones and for some reason those photos sell, mainly because some client, somewhere, needed the shot for some purpose. Some of the photos that have sold for me are not my favorites or technically perfect. Still, they brought me more income than they would have sitting in a hard drive, so I won’t complain. Right now the thrust of stock photography is “authentic imagery”, which can mean different things for different clients but normally means everyday people doing every day things.

The bottom line is that stock photography is not, for most people, a way to get rich fast, but if you keep plugging away and submitting images, you can at least earn a bit of a side income.

You can see some of my stock photography work at the links below:

Alamy

Cavan

Lightstock

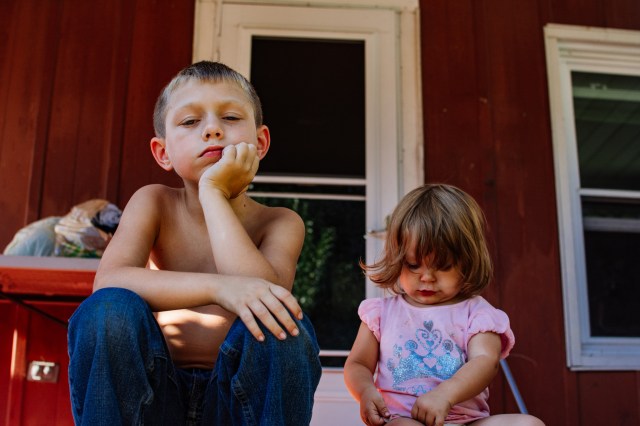
Here is one of my top sellers on Lightstock, a Christian stock agency:

000000_DSC_4669-Edit

It’s been downloaded 64 times so far and you might think that means I made a lot of money from it’s sale, but sadly the total is about $240 in five years. Lightstock is not one of the agencies that compensates photographers at a  high rate, but I support them for their message, more than their revenue capabilities.

To see more of my photography you can visit my photography site here or see my work on my Instagram account.

My camera: the pen of my visual journal

Some people keep a written documentary, some a visual one. I happen to be someone who keeps both.

As you know, if you’ve followed this blog or my work at all, a lot of my images feature my children, which elicits comments such as “Wow. Don’t you have enough photos of your kids?” or “Geesh, your kids will never say you didn’t take enough photos of them.”

I’m never sure if these comments are meant to be sarcastic or sincere but the more they’re made, the more I gather there isn’t a lot of sincerity in there. Instead many seem baffled why I’d want to take some many images of my own children. They see it more as narcissism than documentation, I suppose, and maybe they think I’m bragging somehow when I post the images. I’m not actually sure. More likely, though, they are teasing and don’t mean to be snarky at all.

_DSC0010_DSC0957

My real purpose for taking the images is simply to document life as I see it and since I’m mostly home with them all day, they are who I see. Photography is like therapy to me. It is similar to writing in a journal. It’s a way to work out my internal musings, my deep questions, my efforts to understand a situation or a person or even an entire family, but it is also a way for me to slow down and simply notice the world around me.

Often, before I even take a photo, unless I’m shooting for stock photography, I think about what the scene means to me. Why do I even want to photograph what is happening around me? Do I want these images because of who or what is in them or because how the scene makes me feel? Many times I want to capture a specific moment on “film” (or memory card these days) so that when I look at the photo I am mentally and emotionally (maybe even spiritually) transported.

_DSC5937DSC_1879DSC_2915
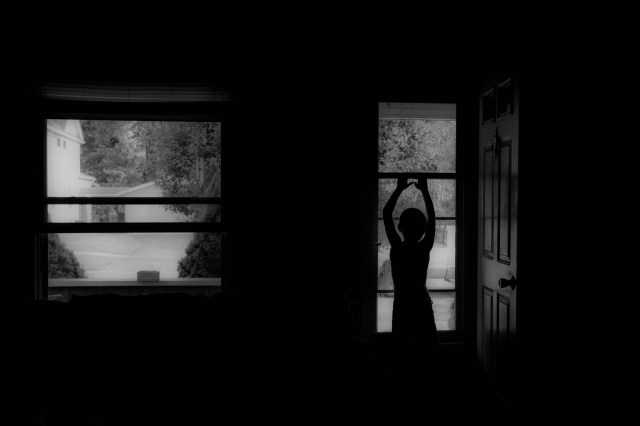
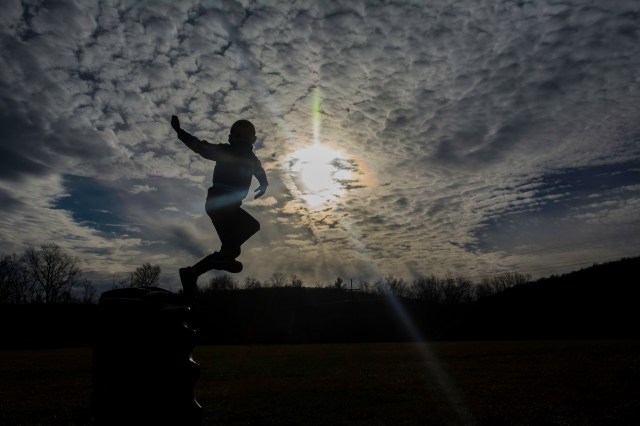
Almost every photograph I take is a desire to capture joy within my life. I rarely take a photo to capture sorrow but if I do it is so I can convey to someone else the heavy emotion of the moment, opening their eyes to the experience of someone else and maybe to try to change the future so similar situations don’t happen again.

I am sure there are some in my family who wonder why I would want to photograph certain situations in my life. When my husband’s grandfather became ill I sat by his bed many days as he slept. I never photographed him, but I did photograph the photo of his wife over his bed, the photograph he lifted his eyes to the day he was brought home from the hospital to be placed in hospice care. He was too weak from the stroke to move but he could lift his eyes upward and he wept at the site of the woman he’d been married to almost 65 years and who had died two years earlier.

The only time I photographed him laying in that bed was the day his older brother came to visit him, holding his hand, and speaking softly. It was one of his more alert moments in those days before he passed. In fact,  it wasn’t long after his brother’s visit that he slipped into a restful sleep and never woke again.

The moment between the brothers was private, intimate, sacred and part of me knew I shouldn’t lift my camera, but on that day the desire to document replaced the worry of offending a reserved and quiet family. It’s not as if I went all paparazzi on the scene. I remember quickly lifting the camera and snapping off two quiet shots and then putting my camera away.

If anyone in the family had witnessed me taking the photos I’m sure they wouldn’t have understood, and may not even today, why I felt I needed to take that photograph. Looking back, I still don’t why I snapped the shots. Maybe because the family was often so shut off emotionally that I wanted to document this tender moment to remind me they weren’t as shut off as I once thought, but simply struggled knowing how to handle painful moments.

Sometimes when we photograph a moment we are doing so to learn something from the moment, not only to teach someone else about what we saw.

_DSC0037_DSC1054

I’ve never shown anyone the image. It’s tucked away in a hard drive and maybe someday I’ll delete it. I’m not sure why I kept it and sometimes I forget I even took it, but then I’ll be looking for another photo and there it is; often showing up when I’m wrestling with a particular quirk of that side of the family. It’s as if God uses the photo to remind me that buried pain creates emotional distance people don’t know how to bridge. In other words, a person isn’t always rejecting us but something inside themselves.

When I  look at photography as a way to document, rather than only a way to create something pretty, I am able to let go of preconceived ideas of perfection. The world of photography opens up and leaves behind the constraints of technical refinement. Learning the technical aspects of photography is a good thing, even a necessary thing,  but being ruled by them is a creativity killer.

When I let go of the idea that every shot has to be perfect, that’s when I can pick up whatever camera I have on me, and document my world. No workshops needed at that point – just a desire to create and learn from what I capture.

Accessing my reason for picking up the camera creates personal art worth looking at.

_mg_0188-2

_DSC4274

————

Find more of my photography at www.instagram.com/lisahoweler or on my photography site: www.lisahowelerphotography.com

Advice for shooting photos in low light

Since I live in the north and our winter months are often cold and dark, the key word being dark, I’ve learned to adapt to shooting in low light so I can photograph my family even when we are stuck inside during the depressing winter months.

Over the years I took a couple of classes on Clickin’ Moms, searched the YouTube archives and scoured the internet for articles to learn how to do improve my low light photographs, something that has proven to be beneficial for freelance assignments, in addition to personal photos.

I thought I’d share a couple of low light tips here, after being inspired by YouTuber Peter McKinnon. Remember, these are all simply tips, and not a list of “rules.” Your photography is your own.

1) Shoot manual.

If you don’t know how to operate your camera manually, I suggest you take a class, or simply look online, and learn how to do so, because being able to adjust settings manually is key to capturing low light images. Knowing how to adjust your camera manually allows you to adjust your aperture, your ISO and your shutter speed, setting it where it is needed to capture your subject, no matter the lighting situation. Most importantly, learning how to operate your camera manually (which is the “M” stop on your camera dial) gives you unfettered control of your photography.

As a self-declared control freak, this fact is a welcome one for me. It’s one of the few times in my life I feel like I have been given control over something and at times I find myself wild with power – adjusting settings like a convict running through the streets after they have just been released from prison. Okay, that was a horrible analogy, but you know what I mean. I like to have control over my photography because when I do I have freedom to create the images I see in my mind.

DSC_1319-Edit

2) Open wide that aperture.

The wider the aperture, the more light is let into the camera, which is basic photography knowledge. Widening the aperture is one of the best ways to grab amazing bokeh during brighter lighting situations, but in lower light, it’s the best way to capture a scene without it being underexposed. Using your light meter in the camera can help you to determine if your scene is too dark or too bright. Your aperture is adjusted by your “f-stop”, if you’re new to this photography stuff.

3) Increase your shutter speed.

If you’re finding you are getting a lot of blur in your low-light images, because the wide aperture is narrowing your depth of field, you’ll need to increase your shutter speed to help capture movement. This is especially helpful for parents photographing their children. Increasing your shutter speed, however, will, of course, make your scene a little darker.

You may ask how you can increase your shutter speed if your aperture is open so wide and the answer to that is your ISO, which you will need to increase to help brighten a darker scene.

4) Increase your ISO.

Your ISO is like your film speed, if you were using a film camera, but you’re most likely not because this is 2018 and everyone has a digital camera at this point.

If you want to get a brighter scene in a low light situation, you’ll need to raise the ISO, which can cause some grain, or noise, in your image, but grain isn’t always a bad thing. Grain can add character, or a more documentary feel to the image. And if you don’t like grain, hopefully, you are using a camera that either handles noise well or lets you shoot in RAW, which brings me to the next tip: shoot in RAW.

DSC_7387

DSC_2136-Edit

5) Shoot in RAW.

While the goal should always be to get it right in the camera, there are going to be times the situation doesn’t allow for perfect lighting,, or the right settings. And for those times there is the RAW setting and luckily most advanced digital cameras today have a RAW setting.

For more information about what RAW means in relation to photography, check out this link.

Shooting RAW allows you to adjust your image in post-processing without causing damage to the quality, since RAW is simply the digital information for the photo, not the actual image. When a JPEG image is edited, repeatedly, for example, it degrades the image to the point of ruining it.

When you photograph in RAW you can take an underexposed image like this, for example,

DSC_5911

and raise the exposure in post edit to end up with a final image like this:

DSC_5912-2

without losing too much quality. If a great deal of noise remains you can use the luminance slider in Lightroom, which Peter discusses in the video below.

There are definitely more tips out there for low light photography than I am mentioning here, but the biggest hope is that by having a few tools under your belt to shoot in low light, you won’t shy away from doing so and will feel free to capture moments in your life no matter the lighting situation.

DSC_7553

DSC_7365-2

To see Peter McKinnon’s tips on low light check out his video, below…

Any questions? Feel free to ask them in the comments. If I don’t know the answer we can look for it together!

___

For more photography tips or simple rambling about photography, rural life or motherhood, be sure to subscribe to my blog on the right sidebar. You can also find my photography at http://www.instagram.com/lisahoweler

Photography for parents: Five tips to photographing your children inside your home

The other day I offered tips on where you can take your children outside of your home to capture memorable photographs of them. Today I want to assure you that you can also photograph your children inside your own home, no matter how dark or cluttered you think it is.

DSC_9625The key word in this post will be “light”, because no matter what your house offers in the way of light you will need light to make your photographs dynamic and interesting. Luckily you can almost always find a way to add more light to a situation and document the moment naturally unfolding before you.

Here are five ideas how to capture better photographs of your children inside your own home:

1) Move them to the light. If you can move them without ruining the moment that is even better. One idea is to encourage your child, or children, to move to an area of the house where there is more light before they begin their activity. This can be in a more lit room, near a window, by an open door or next to a lamp. Of course there is no need to share with them why you are asking them to move their activities elsewhere because, like most children, then they won’t do it.

DSC_7867

2) Get more light on the situation.

You can add more light to your scene in a variety of ways. A few ways include adding a speed light to your camera and bouncing the flash off a light colored surface (preferably white so you don’t pick up the hue of the wall or ceiling), increasing your ISO, widening your aperture, or simply opening some curtains or pointing a light in the direction of your scene or subject. Turning the lights on in a room won’t always provide flattering light, but this is an option. In some cases turning the light on in a room will actually cause your photos to look even worse because you will pick up what is called ambient light (the light in the room) and it could give your subject odd colored skin, either too orange or too blue depending on what kind of light is used to light the room.

DSC_1444-EditWhen it comes to flash, I rarely use the flash that came built into my camera as it often creates unflattering, blown out images of subjects with red, glowing eyes. Instead I use a speed light and bounce the flash off of a wall or ceiling to better light the scene. To learn more about using bounce flash you can read here or watch here.

Of course, if your skills are even more advanced you can use strobe lights or another form or off camera flash or lighting, but that is another post for another day.

3) Watch your backgrounds.

Don’t stop the action but if you can stealthy move the distracting element from behind your subjects then do it, even if you have to ninja roll to push the lamp out of the way. Of course, if you are like me and were born without the athletic gene it might be more distracting if you attempt to move the item and lock your back up in the middle of the ninja roll and start screaming in pain. In the instance where you can’t move the item try to move yourself so the object is out of the view of your camera. If you’re knowledgeable in Photoshop then you could also clone the object out of the background.

DSC_2373

5) Get in close or move further back and try different angles.

Don’t be afraid to move in closer to your subjects, but moving further back (if there is room where you are) can capture environmental portraits or show the viewer what is really happening around the subject. Trying different distances and angles can help add unique and eye catching images for the viewer but also help you to really remember the moment and the details around it.

DSC_5101-2

Bonus tip: let go of your expectations of perfection

This bonus tip is the most important of all the tips and is one you should keep in mind no matter where you are photographing your children. It is also the most difficult tip for me to put into practice, even though I know how important it is.

Children are never going to do exactly what we envision when it comes to photographs of them so we need to accept that our photographs won’t always come out the way we envisioned it in our mind. Sometimes the photo may be even better than what we imagined.

Letting go of my expectations is hard for me because as a photographer I see what I want to capture in my mind and if it doesn’t unfold the way I imagined then I may begin feel discouraged and disenchanted with the moment.

Unfortunately, if we focus too much on our concept of a perfect photo it can lead us to miss precious, camera worthy moments.

Approaching photographs with your children while having the mindset that you are there to document moments, no matter how they unfold, can help make photographing your children more relaxing, enjoyable and memorable for you and them.

DSC_8461

Five places to capture memorable photos of your children

DSC_3155You’re thinking to yourself right now – I’m sure you are – that your house is too dark for photos of your children and that your flash is unflattering and makes your children look albino (which isn’t bad if you are an actual albino, of course.)

So, where can you take photographs of your children that you will cherish for years to come if you don’t believe you can take them at home? (And actually you can take them at home and I’ll tell you how in my next post.)

There is nothing better than being able to distract your child, and maybe even you, with something fun so you can photograph them while they are in action and you are all relaxed. Here are five ideas where to take your children for some photographs of them that you will want to frame and put on your wall or print out to place in your scrapbooks.

1) A local playground. Here is the key about taking photographs of your children at the local playground: don’t try to pose them. In fact, not trying to pose them anywhere is probably the biggest key to child photography. Strict posing of young children often results in disaster and that disaster usually includes tears. Sometimes tears are acceptable for photographs, if you want to capture the emotion of the moment, but minimizing them is always desirable.

If you want photographs of your children as they really are, let them play and photograph them as they play, whether that’s getting messy in the mud or sliding down the slide. Are you looking for a photograph of them looking right at the camera? Well, then get that camera ready because without a doubt they’re going to need mommy or daddy at some point and they are going to turn and look for you and, consequently right at you. And if they don’t? Calling their name once or twice will, sometimes, result in them turning their face toward you. The moment they turn is when you snap the photo you want because as all parents know, asking for them to stop and pose for you may result in cheesy smiles or, worse yet, shakes of the head.


2) A hiking trail.

Not only are you all exploring and experiencing nature but the natural backgrounds and soft lighting created on many hiking trails is the perfect setting for memorable images of your children. If you’re a homeschooling parent, and even if you’re not, you can also make the excursion an educational one by learning more about the plants and trees and animals you encounter.

A couple tips: make sure to protect yourselves from ticks (as Lyme Disease carrying ticks are very prevalent in many areas of the United States, especially Pennsylvania and especially in 2018.); wear protection from the sun; bring water, a snack and a first aid kit; and read up on what those poisonous plants, like poison ivy and oak, and poisonous snakes look like!

One other tip for hiking trails: expect a mess at some point so try to grab your photographs early in the hike if you’re looking for photographs of “clean” children. I have no concept of a “clean child” in my family so this one isn’t a concern for me, luckily, and I just roll with the mud and the wet moments that are sure to occur.

_DSC08493) Museums.

Your local, or even not so local, museum is a great place to learn about history or art and photograph your children. Not only can a museum provide dynamic and interesting backgrounds but it can also provide faces looking up at paintings (great lighting and a good look at the face for the scrapbooks), colorful backgrounds and children engaged in hands on learning experiences.

Visiting a local museum is also a great way to support local art, history, science, whatever the museum features. Tip: be sure to double check for any signs that might prohibit photography in certain areas and again, like other excursions, take snacks (if they are allowed) to be sure you aren’t stuck with photographing hunger-induced meltdowns.


4) Small fairs or art shows.

Almost everything about a small, community fair or art show lends itself to stellar photographs of your children that capture their true personalities. There are rides (laughing faces), games (winning faces), food (messy faces), and sometimes animals (sweet faces). Yes, you may have noticed a theme in that previous sentence because capturing the face of your child is what this is all about after all.

As is the case in other locations, be sure to watch your backgrounds so you don’t end up with the creepy looking dude at the fair standing in the background of the smiling image of your little one.

DSC_3694

5) Ice cream stand.

Nothing makes a kid happier than dairy and sugar, unless, of course they are lactose intolerant. Actually, in all seriousness, my son is lactose intolerant and he takes enzymes that allow him to digest dairy, so the lactose intolerant still can enjoy a trip to the ice cream stand and you can photograph your children while they are in one place, slightly confined and entranced by their frozen treat. Fun images to capture are their ice cream mustaches and their first few licks when the ice cream is bigger than their head.

Bonus: if the ice cream stand has a miniature golf course with it! Even more fun photos can be taken while they play through the course a couple of times.

A couple closing thoughts to keep in mind before you head out the door for photographs with your children:

– make sure your camera battery is not only charged, but in the camera.

– make sure your digital camera has a memory card.

– If you are using a phone, make sure you have a full battery charge or bring a car charger with you.

– try to get yourself in a couple of the photographs so your children know you were there too.

And last, don’t worry if your child doesn’t look at the camera in every photograph. Photographs of children not looking at a camera but still having a good time, laughing or loving each other will still provide great memories for them and their family as they grow.

DSC_1950

Photography tips: Never be afraid to raise your ISO to get the shot you want

I recently joined a Facebook documentary group and right before I joined they had a challenge to capture scenes in the evening, after the sun set, at a higher ISO. For non-photographers, taking photos at a higher “film speed” (ISO comes from the day when photographers used film) can create a lot of grain, dots and pixels in an image, so it is often avoided, unless a photographer really needs to set their camera at a high ISO to get the scene before them.

Since I live in a dark house and in the north of the United States, low light situations and the use of high ISO is often required. It’s something I once lamented, having to push my camera to get a photograph I wanted after dark in my dark home. More and more I now embrace the light and dark and the grain but most of all the creative challenge of   finding the right light and the right position to get the shot despite the less than ideal lighting. 

I didn’t get a chance to submit a photo to the album the other photographers had submitted to in the group, but I  tried the challenge myself one night based on their inspiration. 

My daughter was bouncing on the bed with her brother, procrastinating bed time, and I decided capturing the moment was more important that whatever grain resulted in the final image. After all, the image and memory was ultimately for me, not for a project that required a clear, non-grainy photograph. In the end I’m glad I grabbed the photograph because it was a memory that will mean something to me, even if it doesn’t mean anything for anyone else.

The settings for my image were ISO 8000 (the highest I have ever gone), f2.8 and 1/320.

It was shot on a Nikon d750 with a 50 mm 1.8.

Other photographers in the group submitted their favorites from the challenge with a little information about their settings and what they learned from the experience. I hope you enjoy their images and will even visit their blogs to learn more about their art.

Alicia Thwaites

    This photo is by the amazingly talented Alicia Thwaites. Learn more about her thoughts on the project at  

  This photo is by the amazingly talented Alicia Thwaites. Learn more about her thoughts on the project at  

http://www.aliciatphoto.ca/


Jennifer Blake

This was taken at 6:43pm
ISO 3200, f1.4, 1/200
“I learned that artificial light doesn’t always have to be ugly and I can play with it and get an interesting shot. I can give myself permission to shoot in less than ideal situations and not miss out on moments.” 

www.jenniferblakephotography.com/blog


Adriana Silva

ISO 4000 1/160 f2.5 at 8:30PM.

“I learned that I could push my ISO much higher than I usually go for. I’m including routines that were missing on my memories. Grain… I love grain anyways!”

www.momentsbyadriana.com


Cara Bettcher


6:54pm, ISO 3200, f2.0, 1/100

”While I feel fairly confident working with low light situations (thank you birth photography), I sometimes forget that you can make even the lowest light unique and powerful. This challenge forced me to step outside my comfort zone of just getting a “safe shot” when light is lacking and to embrace it and use it to create something unique and fun.”

www.bornebackphotography.com


Tara Lynn Geldart 

Iso 10,000 1/320 f3.5 @6pm.

“We waited all day to decorate this tree. I was going to move it into the living room to get better light but it was still too dark. I was pretty bummed and almost didn’t take my camera out because I couldn’t make my “vision” work. Instead I bumped the iso and waited for the shot I wanted!” 

www.Tarageldart.com


Kathleen White

 f1.8, 1/160, ISO 3200 7:04pm

“Stalling before bedtime, but I’m in love with those perfect little eyelashes. There is something about this picture that makes me want him to stay little now more than ever before.
Also can I just say how much I loved this challenge. It completely pushed me out of my comfort zone and helped me see light in new ways. And it was nice to have some of these nighttime memories captured even through the chaos, when I wouldn’t normally be taking pictures!”


http://kathleenelizabeth-photography.com/

Jessica Hachey

This was shot at 8:18 pm at ISO 12800. F 3.5, SS 1/200

“My take away was…experiment! I tried really slow shutter speeds, shooting all the way open and cranking up my ISO. The challenge forced me out of my comfort zone…and now my comfort zone is a little bit bigger.”

 www.jessicahachey.ca 

Lori  Hancock McCurdy

F1.8 ISO 10,000
Here’s what I shared about this shot…
“When your husband sits down to play the piano and sing and you think it’s still so cool after 26 years. 
And you want to make a picture of it. 
And then your daughter decides to dance. 
But it’s almost completely dark. 
And then he laughs at you trying to make a picture in the dark. 
But in the end you make the picture that means so much to your heart ❤️”
https://www.instagram.com/loriamcc


Nikki Gould


Taken at 8:54 pm ISO 6400 16 mm f2.8 1/250

I’m not afraid of taking photos in less than ideal lighting. It’s something I’ve been working on, knowing that I do sessions in homes and I’m not always guaranteed outside light coming in through the windows. This challenge certainly helped me push myself and watch for the lighting that I needed to achieve the photos that I took, and to push my camera to the extremes. Luckily my kids provide plenty of entertainment when it comes to getting ready for bed.

www.oliveshoot.com

www.instagram.com/oliveshootphotography

5 tips for holiday photos with kids

I’m sure many parents are planning to attend holiday events this year and taking photographs of their children is almost always part of the festivities. Here are 5 tips for getting the best out of those holiday photos and most of them are the same for any other planned special  moments  where children will be involved.

1) Fill their bellies and get ’em their naps! Make sure your children are well fed and well rested before attempting to ask them pose and smile for a photograph. Low blood sugar and drowsiness is a perfect storm for tantrums, crying fits and uncooperative subjects. The same is actually true for adults. 😉

2) No need for the “smile for the camera!” chant. Don’t actually ask your child to smile. It’s not always necessary to pose your subject or even have them look at the camera to get a good photograph. Sometimes capturing your child in the moment, enthralled or excited about their surroundings is enough to make the moment and the memory magical.

3) Don’t use flash . Not only can a flash be distracting but it can also create unnatural images or allow only portions of the scene to be illuminated. If you’re not a professional photographer and can’t figure out how to take a good photo without the flash in a low lit scene, look for an auto setting on your camera that can help such as the the aperture setting which will allow you to set your aperture wide open, letting more light into the camera. If you can adjust ISO on your camera then definitely boost that up as well. Some smart phone cameras allow you to turn the flash off and will automatically compensate for the lower light.


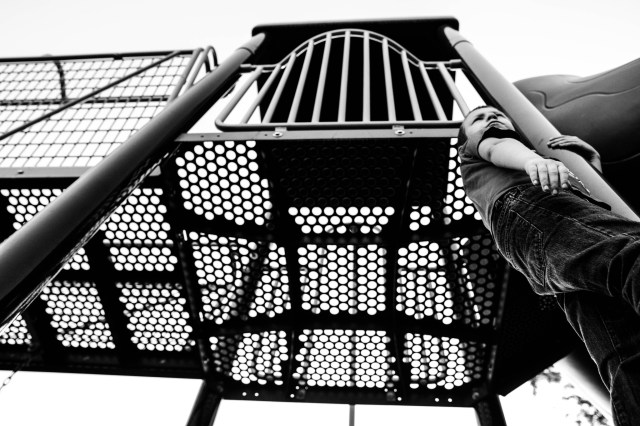
4) Get low. Get down to the same level as your child so you can see what they’re seeing. This tip is true anytime you are photographing children but can especially be helpful at the holidays when the delight in a child’s eyes are what the moment is about.


5) You got to move it! Try different angles/distances. Yes, it can be important to get down on your child’s level but you don’t have to stay there. Sometimes changing your perspective can help give an entirely different feel to an image, whether by conveying a feeling of smallness or magnitude or simply bringing you closer to the action or the moment.


Most importantly and more important than anything is remember to have fun and not become so focused on visually documenting the moment that you forget to live in the moment. Remember to set aside perfection and planning and embrace the spontaneous for the sake of securing memories.

Tuesday tips for mom: Avoid saying ‘Look at the camera’

Every other Tuesday I will be offering practical photography tips for  moms who don’t consider themselves a photographer but still want to visually record the everyday lives of their children. These are merely tips or suggestions, not rules to follow. You should record your photographic memories for you in your own way and hopefully these suggestions will help give you ideas on how to do that.

For more photography tips see my What to Capture series. Other articles in the Tuesday Photography Tips for moms can be found in the Tips link at the top of the page or by clicking HERE.

If you are hoping to grab realistic, authentic images of your children, one tip I have is to avoid always asking them to look at the camera. 

I very rarely ask my children to look at the camera when I am photographing them. I prefer any image I take of a child to be as natural as possible, capturing their real personality. From my experience, children who are asked to look at a camera become self conscious or goofy, which sometimes is the enemy of authenticity.

Think about all the thoughts that race through your mind when someone suggests you look at a camera. Do you find your smiles and reaction forced? That reaction can be the same for children, though they might not think as much about what their hair looks like or how fat they look in their jeans. Instead, children think about putting on a show or being as silly as possible. Silly photographs and expressions are fun for a few photographs, but they won’t always show your child’s true personality.

You will actually find in most cases that a child will look at you even without you asking and that’s when you click the shutter.

Always be ready for the perfect photograph and perfect moment when you’re taking time to try to capture photographs of your children. 

Photographing them as they are engaged in an activity they enjoy, or interacting with someone they love, can create more authentic images of your children and also keep them more relaxed.  Their expressions when they do look at you will be less forced and more natural. 

Some ideas for activities to  help keep your child relaxed and capture authentic images,  maybe even a few looking at the camera, include:

  • Taking a walk in a park;
  • playing at a playground
  • jumping in the Fall leaves
  • interacting with their friends or a family member
  • place a loved one behind you as you photograph
  • swimming
  • hiking


Lisa R. Howeler is a wife and mom living in a small town located in northern Pennsylvania, less than a mile from the New York State border. She is a photographer, writer, chocolate lover, and one of those Jesus freaks your mama warned you about. Find her online at http://www.lisahoweler.com; www.instagram.com/lisahoweler; and Facebook, www.facebook.com/lisahoweler.


What to Capture: Tips for photographing baby showers

This is part of my weekly post, What to Capture, where I give you ideas what photographs you will want to capture at an event or family gathering to be sure you document the day for your memories.

To see previous posts you can see the link to the left or you can click HERE.

Your family member or friend is pregnant and you’re attending the shower. While the shower may not be as monumental as the birth, it’s still an exciting event the mother-to-be will love to have images of in the future.

We’ve all seen the photos from a similar event and usually the images are of the mama opening gifts and that’s about all. While photos of opening the gifts can mean smiles and laughs of the day documented to look back on, don’t forget the other important photographic opportunities. 

The mother-to-be may say she doesn’t want her photo taken because she feels fat. Be sensitive to mama’s feelings, but try your best to gently to remind her how much she will treasure the images after the baby is born and in the years to come. Remembering how friends and family came together to celebrate the arrival of a new baby, whether the first or otherwise, is more important than feeling fat.
If you choose to hire a photographer for the day, don’t be afraid to politely provide a list of images you would like captured from the day. If a friend is helping you, they will also appreciate some guidance on moments you would like to remember from the day.

The following list are suggestions for what to capture. These are suggestions, but you should follow your instinct on what you believe should be visually recorded from the day.

Mama with friends or family

Family and friends are attending the shower to celebrate the new life and the mama is going to want to remember that her guests felt she was special enough for them to take time out of their day to attend her shower and celebrate with her. Photographs of the mama with her guests, either individually or together as a group will create a nice visual memento of the day. You can accomplish these photos through candid interactions between mom and her guests or by asking them to take a moment and look at the camera. Either way, capturing each guest in the photos, in some way will be appreciated by your mom.

Mama with both grandmothers, aunts

Along the same lines of photographing the guests is the need to photograph mom with the grandmothers of the child and with any aunts who are in attendance. Traditionally, at least in the United States, baby showers are attended only by women, but if the grandfathers or uncles of the baby, or other special male members of the family, are in attendance then it’s important to capture them with mommy as well. 

Mama as she opens gifts

I don’t think mom will want photographs of every single gift being opened but a few images of the gift opening moments will be a good addition to the days’ collection of images. Photographs of the gifts themselves are less important than capturing mom’s reactions as she opens the gift. If a gift is especially special, either because of what it is or who it is from, be sure to capture some details of the packaging and of mom with the gift.

Mom with her friends playing shower games

If your baby shower features some fun shower games, be sure to photograph the moments of laughter that are sure to result from the guests interacting with each other. If you haven’t caught on, the theme of the day is “interactions” and “capturing them”.

Mom with daddy

If daddy attends the event, even to pick up some of the gifts at the end, a nice touch to the day would be to capture the expectant parents together. Daddies are important too, but often get left out of the baby shower phase, and in fact, a lot of the planning leading up to the baby’s birth. Remind Dad he’s as important as mom in the life of his child by including him in the celebration, even if it is only a photograph to say “he was there.”

Mom by herself

Keep in mind that for some women, being pregnant makes them feel self conscious. Hopefully it makes them feel beautiful because pregnancy can be one of the most special and amazing periods of time in a woman’s life. But if mom is sensitive to her appearance this day, be gentle and understand she may not want to pose for any photographs, especially if it means standing by herself. If mom is willing, good backdrops to a photo with her include the gifts or even a tree outside, if the baby shower is inside. If mom is uninterested in posing, capture her during the shower, instead of asking her to pose, which can often be uncomfortable, pregnant or not. Candid images are often the way to go when your attending an event, but of course I’d say this because natural and “in the moment” are my favorite photographs to take.

If you take the photographs yourself don’t forget to put the camera down part of the time and enjoy yourself, living in the moments of the event without looking through the viewfinder. And don’t overthink the photographs too much and cause unnecessary anxiety for a day that is meant to be fun and memorable. 


What  to Capture checklist, baby shower edition

  • Mama with friends and family (individually or as a group) 
  • Mama as she open gifts (it’s not important to photograph every gift she opens) 
  • Mama with the grandmothers either together or individually
  • Mama with aunts, sisters, friends, either as a group of individually
  • Mama and her friends playing shower games
  • Details of some of the gifts, little bows or teddy bears
  • Mama and daddy if daddy attends (don’t forget that dads are important too!)
  • Mama alone with some decorations or in a chair or with a pretty backdrop of some kind (even outside by a tree)

Don’t forget to print your images in some way, whether with actual prints you can place in a book, or in a photo album you can design online. Some suggestions for where to print include Shutterfly and Mpix. I make my memory books on Blurb, but Shutterfly also offers this service. Additionally, you can make books directly from your phone with aps such as Chatbook and Artifact Uprising.

Interested in other posts in the What to Capture series? Find more posts HERE.